free counters

Monday, November 29, 2010

Frying pan


Sweet frying pan for sale !


A close look of this pan


The stencil I used for the words


Before decoupage on the tissue


Before : a rusty frying pan and painted with yellow


Monday, November 22, 2010

Flower pot


A cat sit quietly with my makeover of this flower pot


See ! A new look for this flower pot


The equipment I used : a simple stencil sheet and old brush


Before : Another worn out white flower pot


The other side of the flower pot. A simple and quick way to decorated a flower pot


A simple stencil word to brighten up an old flower pot


Before : Old and dirty flower pot


Sunday, November 14, 2010

Signboard


A good way to recycle an old board, think twice before throw it away. I am just starting to explore the world of word stencil. Any surface( even with stain) can be used as a practice base. No base preparation is required.


Is it a good idea to recycle a board.

Different way to hang the board around the garden


After : A good way as a practice board for stencil work. A simple folk art is added to decorate the stencil work.
Before : Just an old and broken board, actually it was the back of the board. Thinking of throwing it away when looking at the stain line.


Posted by Picasa

Friday, November 12, 2010

Decoration

Guess what is this ? The person who guess it right will get one of it for free.

Wednesday, November 10, 2010

Plank


Deco 3 : A nice decoration for car porch area


Matched well with the garden


A butterfly was added on when I found it somewhere in my garage.


Deco 2


Deco 1


Only two small parts of surface was used to decoupage the pot picture on.


This green and yellow leaves were done by using real leaves to press on the surface. But the result was not satisfactory.


A closer look of the stenciled word. This was my first attempt to do stencil work.(I do the stencil free hand as it was just a testing work)


Stenciled some words on the surface with black paint. This pattern of tissue was chosen for the decoupage work. I just take two pictures of the pot flower to keep it simple


Before : A rotten and old wood plank with hooks. Need to use sand paper to clean first. No paint was used on any surface as I wanted to keep the original look


Materials to use for this project.

Monday, November 8, 2010

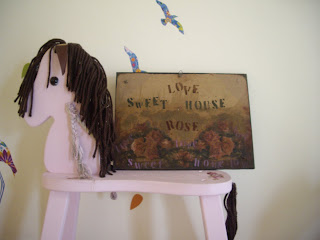
Picture board


Decoration 4 : This is my favourite. A good idea for garden decoration,


Decoration 3 : Add to my decoupage work corner


Decoration 2 : Sit quietly next to my teapot collection and money plants


Decoration 1 : Decorate with my cut garden plant


A closer look ( don see so close, you would noticed some imperfection. water stain+ dirt stain)


Finally, A nice decoupage work see from far ( first time trial on dark surface, an instant idea struck on when I was just too tired to continue )


Phase 7 : More words ( in purple ) was stenciled on the bottom ( the surface there was just too dark)

Excuse : I made a big mistake, I decoupage the wrong side of tissue ( the dark side suppose to be at the side not the centre) Instead, I used the sponge to brush out the darker tissue( quite a mess initially). The purple words was made to cover my mess and mistake (hahaha)


Phase 6 : The brush was used (add on more decoupage medium) get a more even surface ( remember : do not brush to hard)


Phase 5 : Spread the whole piece of tissue on the surface and pressed evenly with sponge ( don ask me what brand of sponge I used, is just the dishing washing sponge!)


Phase 4 : With my finger dip with little water, circulate the decoupage medium evenly to cover the whole area


Phase 3 : The decoupage medium was directly applied on the board ( just press without adding any water)


Phase 2: Suppose to draw some folkart on it but changed my mind when I flipped through the tissue collection. Try and error to decoupage the rose with dark background on the board ( without any surface preparation, just want to fast and to be honest, I was just to lazy at that time and greedy to see the instant result)


Phase 1 : Just stencil the words on it ( free hand to arrange the words)


Before : Back of the tulip picture( see the staple at four side, just keep for nothing as too lazy to remove it,hihihi)

reason to use : Just to bore with the picture and lazy to paint the surface


Before : The front page of this picture


Tuesday, November 2, 2010

Recycle Beg


Makeover of another simple yet elegent style of recycle beg ...


This heart shape tissue was abandoned for some times due to unmatched with the cottage style of my usual decoupage work

Well, It went so well with the recycle beg, simple yet elegent


Creative, simple, fun.......


Origial look of this recycle beg